
Installing video surveillance cameras is a vital measure for enhancing the security of your home or business. Whether you want to deter potential intruders, monitor daily activity, or ensure the safety of loved ones and assets, a well-implemented surveillance system can provide invaluable peace of mind. From selecting the best camera for your specific needs to ensuring proper placement and functionality, the process can seem overwhelming. This guide will help you navigate through choosing the right camera, gathering the essential tools, and following the step-by-step process for installing video surveillance cameras, ensuring your system is both effective and easy to manage.
Choosing the Right Type of Surveillance Camera
Before diving into installation, selecting the correct type of surveillance camera is vital. Different cameras serve specific purposes, and your choice depends on the location, coverage area, and features you need. Here are some common types of cameras available on the market today:
Each camera type has unique benefits and must be chosen based on your specific needs, such as night vision, weatherproofing, and motion detection.
Essential Tools and Materials for Camera Installation
Gathering the right tools and materials will make the installation process smoother and more efficient.
Tools You’ll Need:
Having everything on hand before starting will save time and avoid interruptions.
Step-by-Step Guide to Mounting Your Cameras
Once you have selected your cameras and gathered the necessary tools, it’s time to install them. Follow these steps to mount your surveillance cameras effectively:
Step 1: Identify Camera Locations
Start by planning the positioning of your cameras. Ideal spots include entrances, driveways, garages, and high-traffic areas inside the home. Ensure that each camera has an unobstructed view and isn’t easily tampered with. Additionally, verify that the cameras are in range for power sources or strong Wi-Fi connections.
Step 2: Install the Mounting Brackets
Using your power drill, install the mounting brackets where you’ve planned to place the cameras. Ensure that the brackets are securely fastened to withstand weather conditions and prevent tampering. If the cameras are being installed outside, check that they are weather-resistant.
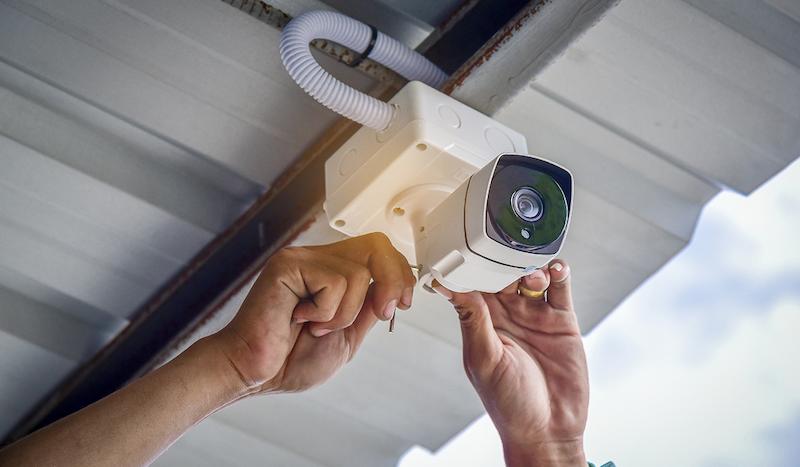
Step 3: Mount the Cameras
After the brackets are secured, attach the cameras. Position them according to the coverage area, making sure they’re angled to capture the desired footage. Double-check the positioning with a monitor before finalizing to avoid blind spots.
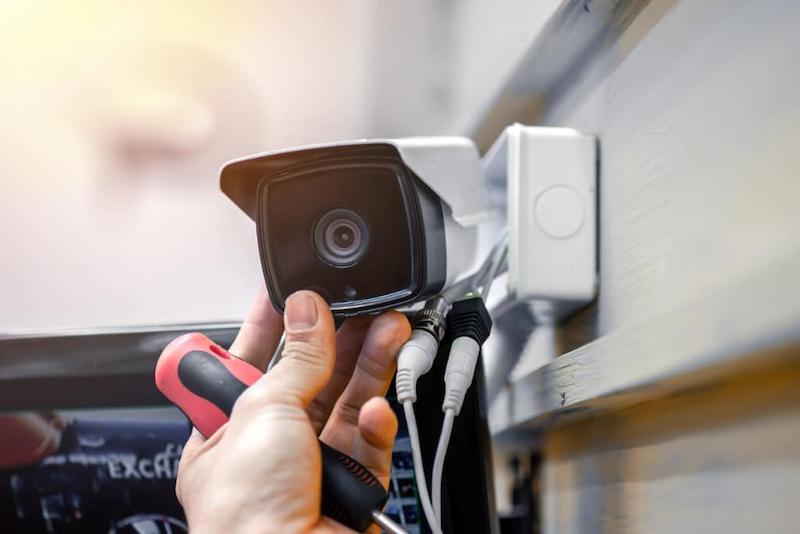
Step 4: Run the Cables (for Wired Cameras)
If you are using wired cameras, you’ll need to run the cables from each camera to your recording device or network. Use fish tape to pull cables through walls, and secure them with clips or ties along the way. Keep the wires organized and out of sight for a cleaner installation.
Step 5: Connect to Power
For both wired and wireless cameras, ensure each unit is connected to a power source. For wired setups, connect the cables to the DVR/NVR and power outlet. For wireless cameras, plug them into their power adapters.
Connecting and Configuring Your Surveillance System
Once your cameras are mounted and powered, it’s time to connect and configure the system.
Wireless Camera Setup:
Wired Camera Setup:
Configuration Tips:
Conclusion
Installing video surveillance cameras is an effective way to protect your property, whether it’s a residential or commercial setup. By following these steps, you’ll ensure that your cameras are mounted securely, connected properly, and configured for optimal performance. A well-installed surveillance system will provide continuous monitoring, help deter crime, and offer peace of mind.
FAQs
What should I consider before installing a surveillance camera?
Before installing, think about the location, camera type, power source, and whether you prefer wired or wireless cameras. Also, ensure that the cameras have a clear view of important areas and won’t be obstructed by weather or other objects.
Can I install surveillance cameras myself?
Yes, most homeowners can install surveillance cameras with basic tools. Wireless cameras are especially easy to install, while wired systems may require more planning and skill, especially if you need to run cables through walls.
How do I maintain my surveillance cameras for optimal performance?
To maintain your cameras, clean the lenses regularly to prevent dirt or debris from affecting the image quality. Ensure that the cameras are securely mounted and check the wiring for any wear and tear. It’s also a good idea to check the software periodically for updates and ensure that your system’s storage isn’t full.