
Crafting has long been a favorite pastime for many, offering both creativity and relaxation. But when it comes to making something both beautiful and practical, few crafts are as captivating as Kumihimo. Bold, intricate, and richly traditional, Kumihimo bracelets are more than just accessories—they’re pieces of art with centuries of history behind them. So, if you’ve ever wondered how to make a Kumihimo bracelet, you’re in the right place. Let’s explore this exciting craft and help you create something special from the comfort of your own home.
What are Kumihimo Bracelets?
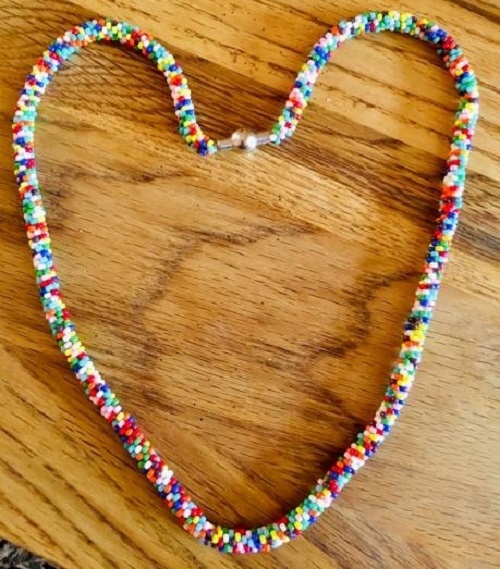
Kumihimo bracelets are traditional Japanese braided accessories, dating back over 1,000 years. The word “Kumihimo” translates to “gathered threads,” and the technique was initially used to create intricate cords for Samurai armor and ceremonial attire. Today, these bracelets have become popular as stylish, handmade jewelry pieces. Crafted using a circular loom or disk, Kumihimo allows for endless design possibilities, from simple solid-color braids to complex multi-colored patterns. The braiding technique is not only visually striking but also easy to learn, making it perfect for both beginners and seasoned crafters. Whether adorned with beads or left in a minimalist design, Kumihimo bracelets are a beautiful way to showcase your creativity and personal style.
Gathering Your Materials That You Need
Before you begin crafting your Kumihimo bracelet, it’s essential to gather all the materials. Unlike some other crafts that require lots of tools and gadgets, Kumihimo requires just a few essentials. Here’s a list of what you’ll need:
1. Kumihimo Disk or Loom
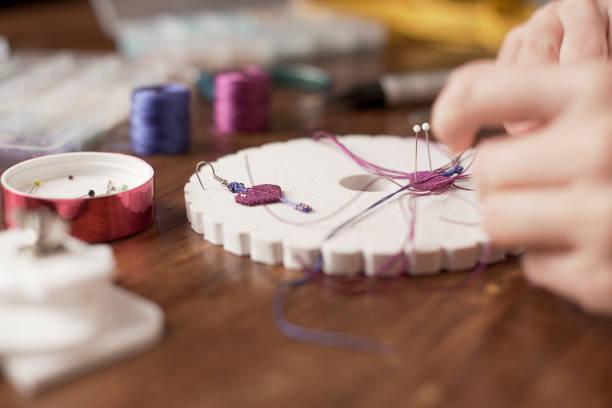
The heart of this craft is the Kumihimo disk or loom. The most common choice for beginners is a foam Kumihimo disk, which is lightweight, portable, and affordable. These disks typically have numbered slots around the edge, which helps keep your threads organized. If you’re feeling more traditional, you can opt for a wooden Marudai, although it is a bit more advanced to handle.
2. Embroidery Floss or Cord
The threads you use are crucial in determining the final look of your bracelet. For beginners, embroidery floss works great. It’s smooth, comes in a wide variety of colors, and is easy to manipulate. As you progress, you might want to experiment with thicker cords like satin rattail or even leather for a different texture.
3. Clasp or Fastener
Once your bracelet is complete, you’ll need a way to fasten it. There are several options, such as magnetic clasps, button closures, or even simple knot closures. Clasps provide a more polished look, while knots offer a rustic, boho vibe.
4. Beads (Optional)
If you want to add an extra touch of flair to your bracelet, beads can make a huge difference. You can incorporate them into the braid itself or add them as decorative elements when the bracelet is finished. Just ensure the beads have a hole large enough for the cord to pass through.
5. Scissors and Tape
You’ll need scissors to trim your thread and tape to secure your cords when you begin braiding. Some people prefer to use a clip or binder to hold the bracelet in place while they work.
6. Measuring Tape or Ruler
It’s helpful to measure the length of your cord before starting, especially if you want your bracelet to fit perfectly. The general rule is to use about four times the length of the finished bracelet for your cord, so it’s good to have a measuring tape on hand.
Once you have all your materials ready, you can move on to the fun part—learning how to make a Kumihimo bracelet step by step.
Step-by-Step Guide to Making a Kumihimo Bracelet
Now that you have everything you need, it’s time to start crafting. Follow these steps, and you’ll have a beautiful Kumihimo bracelet in no time.
Step 1: Prepare Your Threads
Cut 8 strands of your chosen thread or cord, making each strand about 20 inches long. If you want a thicker bracelet, you can use multiple threads in each slot of your Kumihimo disk. Align the ends of the threads and tie them into a knot, leaving about an inch of tail beyond the knot.
Step 2: Set Up Your Disk
Take the knot and push it through the center hole of your Kumihimo disk, allowing the tail to hang down from the back. Arrange the threads in the slots around the disk. For a basic bracelet, place one strand on each side of the four compass points (top, bottom, left, and right). Make sure the threads are evenly spaced and follow the numbering if your disk has numbers.
Step 3: Start Braiding
Now for the fun part! Hold your disk so that two threads are pointing upward (12 o’clock) and two are pointing downward (6 o’clock). Begin by taking the bottom left thread (located at 6 o’clock) and moving it to the top left slot (located at 12 o’clock). Then, take the top right thread (at 12 o’clock) and move it to the bottom right slot (at 6 o’clock).
Next, turn the disk 90 degrees clockwise and repeat the process. Always take the bottom left thread to the top left and the top right thread to the bottom right. Continue this braiding process, rotating the disk 90 degrees after each move. This creates a smooth, spiral braid.
Step 4: Keep Your Tension Even
As you braid, it’s important to maintain consistent tension on your threads. This ensures that your bracelet has a uniform appearance. If the tension is too loose, the braid will look uneven. Too tight, and it may be difficult to manage. Regularly check your work as you go to ensure evenness.
Step 5: Add Beads (Optional)
If you’d like to incorporate beads into your bracelet, now is the time! Slide a bead onto the thread before you move it across the disk. Make sure the bead sits snugly in place before moving the next thread. This will add a lovely texture and shine to your design.
Step 6: Finish the Braid
Once your braid is the desired length (typically around 6-7 inches for a bracelet), remove the threads from the disk, keeping them in their order. Tie a knot at the end of the braid to secure it, just as you did at the beginning.
Step 7: Attach the Clasp
Trim the excess thread, leaving about an inch to work with. Apply a dab of glue to prevent fraying. Then, attach your chosen clasp or fastener. If you’re using a magnetic clasp, for instance, you’ll simply glue or sew the ends into the clasp.
Step 8: Admire Your Creation
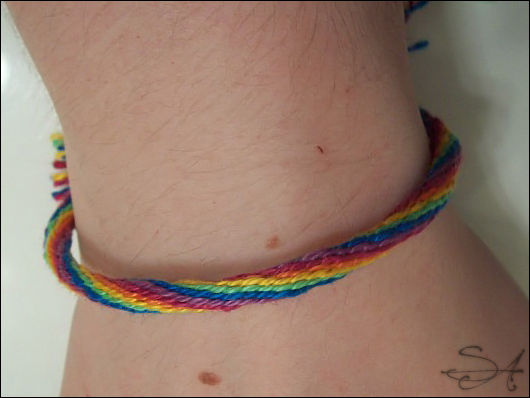
Congratulations—you’ve just completed your Kumihimo bracelet! Take a moment to admire your work and appreciate the skill and patience that went into crafting it. Whether you keep it for yourself or give it as a gift, your handmade Kumihimo bracelet is sure to impress.
Conclusion
Learning how to make a Kumihimo bracelet is not only rewarding but also incredibly fun. With just a few materials and a bit of practice, you can create beautiful, customized bracelets that are perfect for any occasion. Whether you prefer bold, colorful designs or simple, elegant styles, Kumihimo allows you to express your creativity in new and exciting ways. So, why not gather your materials, follow these steps, and start making your own Kumihimo bracelets today? The possibilities are endless, and you’re sure to find joy in every twist and turn of the braid.
FAQs
How long should the string be for a Kumihimo bracelet?
For a Kumihimo bracelet, the string should be about 3 times the desired finished length of the bracelet to allow for braiding and knotting.
How many beads do you need for a Kumihimo bracelet?
The number of beads needed depends on the pattern, but typically you’ll use about 70-100 beads for a standard 7-inch Kumihimo bracelet.
How much thread do I need for a Kumihimo bracelet?
For a Kumihimo bracelet, you generally need about 2-3 yards of thread per strand, depending on the bracelet’s length and thickness.